Showing posts with label annie sloan chalk paint. Show all posts
Wednesday, February 18, 2015
Super Cheap to Super Chic Craigslist Makeovers
Friday, February 13, 2015
Give a Tired, Old Sofa Table a Fun Chalk Paint Transformation
Another Great Craigslist Find!
All Dressed Up With a Little Bit of ASCP
Ok, so I have to be honest here. I didn't take any process pics. At least, if I did, I can't find them (it was before Christmas and Ben was away at the time, so I can't remember). So all I can offer you are a few before-and-after shots, but the whole point of the post is that it's another fun example of how you can totally score on an inexpensive Craigslist find.
Saturday, January 11, 2014
Milk Paint Drop Leaf Table
From Disaster to Divine
Warning: MMS Milk Paint May Play with Your Emotions ;)
I'd been searching for a drop leaf table for some time, but I could never seem to find one that met my size and budgetary needs, until this one. Purchased through Craigslist (yup, another one of my Craigslist's finds) for a mere $20, it was the perfect piece for me to experiment with the Miss Mustard Seed Milk Paint I'd been dying to try.
Since there aren't any MMS retailers near me, I opted to buy online from the retailer who was geographically closest to me, Sea Rose Cottage in RI (a cute shop I can't wait to visit next time I'm in the area). Since I desperately wanted to obtain the "chippy look" (and I'm always trying to save money), I opted to risk skipping the bonding agent (anyone see where this story's going)? For those not familiar with MMS Milk Paint, the bonding agent is a substance that gets added to the paint in the event that the paint doesn't adhere properly to your surface (to facilitate the "bond"). So, I purchased one bag of Eulalie's Sky (the paint comes in a powder form) along with a container of Hemp Oil. Simple enough? Well... so I thought.
![]() |
| Source: Instagram |
When I finally got some alone time to spend with my table and my Milk Paint, I was thrilled! I used a paint stick to mix the paint (this was trickier than I thought; I had a hard time getting all the powder to dissolve). Being used to chalk paint, I was surprised at how thin the consistency of the milk paint was, but I had watched a few tutorial videos, so I knew I had to keep an open mind and expect a different experience. And although I heard Marian say over and over in the videos that you can't always predict how it the paint will act, I was hoping with all my heart that my piece + my paint would = my desired chippiness.
After one coat I couldn't tell what was going to happen. It wasn't quite bubbling that much (which would indicate an area that would easily "chip"), but I did see it happening in some areas. So I decided to apply another coat... and that's when it happened. Bubbling overload.
Everything bubbled up (and consequently chipped off as soon as I touched it). And, yes, hindsight being 20-20... I should have ordered the bonding agent. Soooooo, back to the internet, another order (and another shipping charge). And this time I ordered the milk paint mixer, too, because of the trouble I had mixing it last time (the device is basically a milk frother, so if you have an extra on hand, you could use that).
But after receiving the next package, a cold spell ensued (and the table was in the garage). So the cold, mixed with my earlier disappointment, caused the drop leaf table project to come to a halt.
Fast forward a couple months later, and I became determined to finish the project (and this time I moved the table inside). And I'm so happy (and very relieved) with the final results. Here's how it went.
Steps for Painting the Drop Leaf Table with MMS Milk Paint (and an ASCP Stripe)
- Mix the paint (and in my case, add the bonding agent). I recommend using the electric frother-mixer.
- Paint! And paint some more. The paint is thin (although you could adjust this by adding less water, but I didn't have much to work with, so I was stuck with what I had)! After reading the directions, but after mixing the paint (yea, in general, I tend to have some trouble following directions), I found out that you only need to add the bonding agent on the first coat. But I had already mixed it all together (because I only had about half a bag of powder left). So the bonding agent was in the paint for each coat. My mix lasted me about three coats (although certain parts could have taken another coat, but I wasn't going to buy a whole new bag for that).
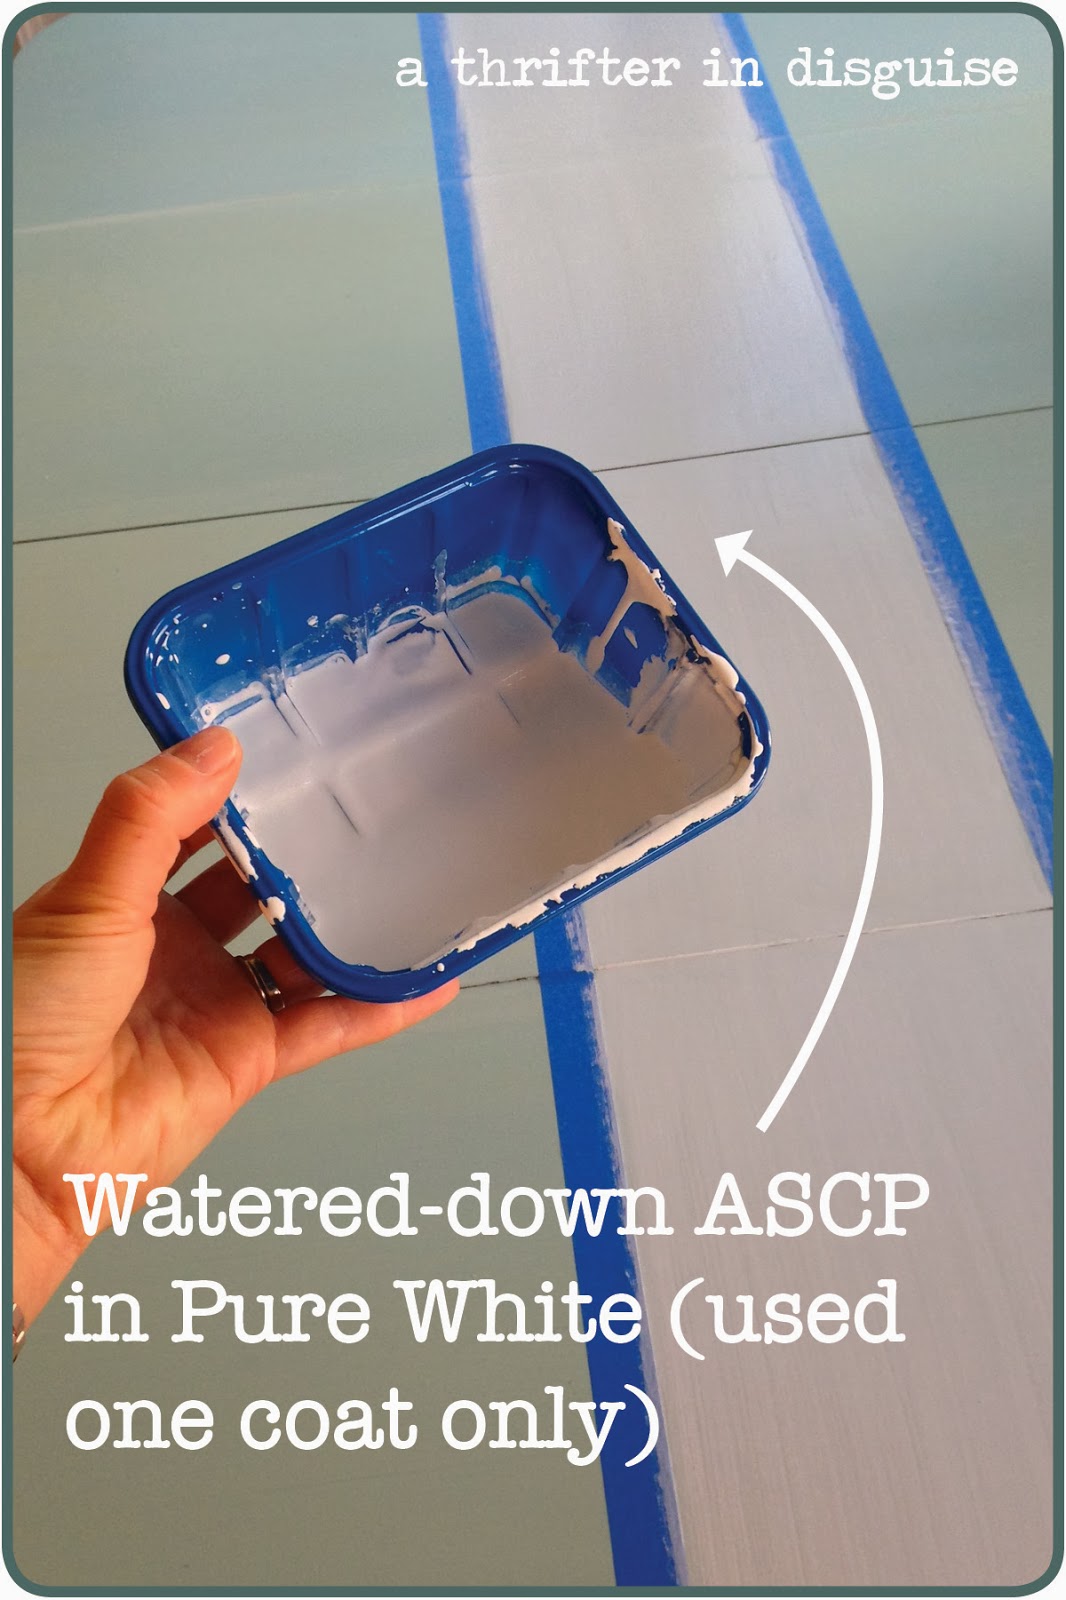
- Add the stripe. Although I was happy with the color of the paint, I thought the table was a little boring, so I decided to add a stripe. I had Annie Sloan Chalk Paint in Pure White on hand, so that's what I used. I wanted the stripe to be subtle, so I watered down the paint and only applied a thin coat.
- Distress. As Marian suggests in her videos, I used a paint scraper to distress the table. Although I had to work pretty hard at it (that bonding agent sure did its job!), I still liked this process SO MUCH better than using sandpaper or nail files (that's what I used on my Distressed Dining Table). I just can't stand how HOT the sandpaper/files get because of the friction when you're working... it gives me stomach-churning goosebumps, the way some people feel about fingernails on a chalkboard. Yuck. I don't even like thinking about it. Soooooo the paint scraper was the best idea I've heard in a while! Nice plastic handle = no friction on my fingers!
- Apply the Hemp Oil. This was my favorite part! I used a cut up old tee-shirt to apply the wax, and the consistency was so nice. As soon as it touched the paint, a lovely hue emerged, making me soooo happy. Before this step I was doubting I'd use MMSMP again, but after using the hemp oil (and a little experience behind me), I think I'm going to give it all another shot! I followed the instructions and wiped the excess oil off after 30 minutes.
![]() |
| Here's one of my laundry helpers ;) |
![]() |
| Top View: I'm so happy I added the stripe! |
Have you used Milk Paint? What have you used it for? Do you like it? After all this, I need someone to commiserate (and celebrate) with ;)
Follow along on Pinterest and Instagram for more of my DIY adventures!
Featured On:
Friday, May 31, 2013
Vintage Chifferobe DIY Part I
Vintage Chifferobe DIY Project
...making some progress, at least
It's really hot here today. And I want to be productive, especially while the baby's napping, but I don't know if I have it in me to do any more work. Even if I started painting, it's so humid I don't think the paint will ever dry!
So today I am posting pics of my current project, in its current state. I picked up this chifferobe a couple months ago at an estate sale.
It was the last day of the sale; a bunch of siblings were selling the last of the items from their parents' house. I really just stumbled across this sale, because I happened to see a sign on my way to church (rushing there after an early-morning free craigslist pickup). After church, I told my husband I would just quickly run by this tag sale, and since I offered to bring the baby with me (and we had driven separately anyway), he didn't roll his eyes TOO much, and I was on my way.
As soon as I pulled up, I noticed this beauty. I loved the shape of it. I wasn't sure what it was from the curb, it almost looked like an old ice box or something. But I didn't really care. The sign said "Vintage 70's Chifferobe - $40." Well, I loved it. I didn't love the color (which I do think is cool, it's just not in my comfort zone). And thanks to the $10 bill my husband had given me for something (that I ended up not using), I had a solid $27 in cash in my possession (I rarely carry cash... it's sorta bad... I rely on my debit cards way too much). So I offered my $27, and they happily accepted... and helped me load it into the car and tie the trunk down (because it didn't fit with the craigslist chair also inside-LOL-apparently my husband's big eye roll was reserved for when I pulled into our driveway after this). The back story on the piece (I love the back stories): they'd had it in their house growing up, and that they used to hide inside the little closet part when they played hide-and-seek. And would you believe, after becoming accustomed to it in our garage for the past couple months, my kids have been doing the exact same thing. I believe it was meant to be :)
It sat in the garage for a while, but I think I'm finally ready to do something with it. I decided that, when I'm done painting it (and finding new hardware-maybe at the Country Living Fair next week?), it will live in our family room. I'm hoping it can be a pretty exterior to hide all the papers and toys and supplies that have a tendancy to make their way up from the playroom on a regular basis... and instead of fighting it all (I really wanted to keep the family room toy-free since we have a designated play room now), I will embrace it (but at the same time hide it).
There you have it, the Vintage Chifferobe, Part I. BTW if anyone know anything about this kind of furniture--how old it might be, what it was used for? Please let me know!
Thursday, April 25, 2013
Craigslist Dining Table Transformation
Craiglist Dining Table Transformation
You really can't go wrong with something that was FREE to begin with! There she was, in all her former glory. If you don't know about the "Free" section in Craigslist, you really should check it out! A lot of times there's just junk listed, but there are many times when people just want to get rid of something ASAP because they're moving or getting new furniture. But things in this section go fast, so you need to check back often and act quickly!
With this piece, I was immediately drawn to the pedestal base. Our current round kitchen table has the standard four legs, and whenever you have more than four chairs around it, someone is always straddling or banging against a leg. I figured paint could cover up any blemishes, so I jumped on the offer... and we picked up this baby (by "we," I mean my husband, somewhat begrudgingly). I didn't like the finish at all, so that's what I decided to change.
Pictured here are some of my main supplies (how cute are my pink work gloves?!). I love Annie Sloan Chalk Paint. I doubt there is anyone who's used it and doesn't love it. And this can of duck egg has made its way through several entire projects, and there's still some left.
My vision: I knew I wanted the top of the table to be a different color than the base. But that's where it got complicated. Originally, I painted base in duck egg and I painted the top in bright white. I had an image in my mind I was trying to attain, the white was a big mistake. It was so offensive, I stripped it off right away and went a new direction: stain (should have taken a pic, I know). But onto my first attempt at staining.
At the hardware store, it was fun looking at all the stain color samples, and decided on this one: Minwax Polyshades (color: Mission Oak). This line is a "stain and finish in one step." I thought that would save me some time, but it really just confused me. At first, I was wiping it off the way I understood you should apply traditional stain... but it was too light, and I couldn't understand why the directions said I needed to wait 6 hours to apply another coat! I applied one sooner, because it had dried... and not much luck with that one either. DUH. I wasn't supposed to wipe it off, I was supposed to apply an even coat and simply let it dry! Which I did, when finally realized that. But that "even coat" was really hard to achieve. Especially hard for a novice, and I'll be the first to admit that my tabletop is certainly FAR from "even coated." But I really like the color, and I can live with the mistakes, and it was a lesson learned. Would I use the Polyshade again? Maybe... but I'd need more practice, which means more time... and I'm sorta an instant gratification kind of gal.
Anyway, this is what I ended up with. This pic is without the leaf in the middle (we'll use the leaf when we have guests) but I like the perfect circle look better.This was a great learning experience project for me. It's certainly not perfect, but it's a big improvement over what we are currently using (and over what it was when I picked it up free from Craigslist, I think)!
Does anyone else have tricks for a more seamless staining experience? Please share! I love the look of the stain, and want to continue experimenting with it, but I'm on the hunt for more tips!
You can also check it out on Metamorphosis Monday at Between Naps on the Porch!

Subscribe to:
Posts (Atom)