Google+
Showing posts with label laundry table. Show all posts

Thursday, January 23, 2014

An Organized Laundry Folding Station

A Laundry Center that Holds Everyone Accountable ;)

with Free Printables {in 6 colors!} to Make Your Own


When we moved into our new house last year, we had to make some adjustments because it was a smaller space. And while I'm perfectly happy to downsize (in general I think we've come to rely on more things and space than we actually need), I did have some struggles getting used to my new "laundry room" (i.e., a closet with stackable machines).

Since the laundry closet is located in our upstairs hallway, I did inherit the convenience of not having to haul our laundry up and down the stairs for each load. On the other hand, I had no space to fold or organize anything when it came out of the dryer (well, that's not entirely true. I would often toss it all on top of one of my daughters' beds, but that created a whole bunch of other issues).

http://thrifterindisguise.blogspot.com/2014/01/milk-paint-drop-leaf-table.htmlI decided that what I needed was a drop leaf table somewhere in the hallway; I wanted a piece that wasn't overwhelmingly large but had the versatility to accommodate more space when I needed it. Now that I knew what I wanted, I watched Craigslist for months to find the perfect piece (this was harder than it sounds. I needed a specific size in a specific price range--I didn't want to spend more than $30). Finally I found the right table, negotiated it to the right price ($20!), and after a little makeover, my Laundry Station was finally coming to life!


Creating a Laundry Station


As happy as I was with my new space, I still had more work to do. Living with three little kiddos, I feel like a ridiculous percentage of my days are devoted to cleaning up after them. And they're still young, so I give them some slack... but it's about time they started taking more responsibility for their things, and I thought this would be an easy way to start. Now, when clean laundry is folded and sorted by person, it's placed into a nice, clean laundry basket with a personalized label. Neat, organized, and pretty! And so so so easy. And to make it just a little more fun for the kiddos, I chose to use their FAVORITE different colors for the tags.


To Create This Laundry Station, You'll Need:


  • Small Laundry Baskets from Dollar Tree
  • Closepins
  • Laundry Letter and Icon Tags (Free Printables Below)
  • Printer and Printer Paper
  • Scissors 
  • Hot Glue Gun and Glue

A Few Tips on the Process
  • I used cardstock (125 lb) to print the tags, but if you don't have any, you could attach the tags to some thin cardboard (like from a cereal box) to give them a little more stability. If you have access to a laminator, you may want to consider laminating them, too, just to add extra durability.
  • I used regular ol' scissors to cut out the letter and icon tags.
  • Use hot glue to attach the tags to the closepins.


I like this system because it allows me the flexibility of labeling the baskets ONLY when I need to. This way I don't have a bunch of baskets hanging around for no reason. When the tags aren't in use, I just clip them onto a little basket until I'm ready for them.


Download Your Own {FREE!} Laundry Letters and Icons Here


Yes, they are free! All I ask if that you leave me a comment in this post letting me know which color you're choosing and/or how you'll be using them! Not a "commenter"? That's ok! Follow me on Pinterest instead! And enjoy!!

Laundry Station Letters {in Blue}
Laundry Station Letters {in Olive Green}
Laundry Station Letters {in Violet}
Laundry Station Letters {in Pink}
Laundry Station Letters {in Orange}
Laundry Station Letters {in Turquoise}


I hope you enjoy the tags (and that they help you recruit some new laundry helpers)!

 Let's connect! I'm most active on Pinterest and Instagram.


Featured On:
The Crafty Blog Stalker

Saturday, January 11, 2014

Milk Paint Drop Leaf Table

From Disaster to Divine

Warning: MMS Milk Paint May Play with Your Emotions ;)


I'd been searching for a drop leaf table for some time, but I could never seem to find one that met my size and budgetary needs, until this one. Purchased through Craigslist (yup, another one of my Craigslist's finds) for a mere $20, it was the perfect piece for me to experiment with the Miss Mustard Seed Milk Paint I'd been dying to try.

Since there aren't any MMS retailers near me, I opted to buy online from the retailer who was geographically closest to me, Sea Rose Cottage in RI (a cute shop I can't wait to visit next time I'm in the area). Since I desperately wanted to obtain the "chippy look" (and I'm always trying to save money), I opted to risk skipping the bonding agent (anyone see where this story's going)? For those not familiar with MMS Milk Paint, the bonding agent is a substance that gets added to the paint in the event that the paint doesn't adhere properly to your surface (to facilitate the "bond"). So, I purchased one bag of Eulalie's Sky (the paint comes in a powder form) along with a container of Hemp Oil. Simple enough? Well... so I thought.


Source: Instagram

When I finally got some alone time to spend with my table and my Milk Paint, I was thrilled! I used a paint stick to mix the paint (this was trickier than I thought; I had a hard time getting all the powder to dissolve). Being used to chalk paint, I was surprised at how thin the consistency of the milk paint was, but I had watched a few tutorial videos, so I knew I had to keep an open mind and expect a different experience. And although I heard Marian say over and over in the videos that you can't always predict how it the paint will act, I was hoping with all my heart that my piece + my paint would = my desired chippiness.

After one coat I couldn't tell what was going to happen. It wasn't quite bubbling that much (which would indicate an area that would easily "chip"), but I did see it happening in some areas. So I decided to apply another coat... and that's when it happened. Bubbling overload.

Everything bubbled up (and consequently chipped off as soon as I touched it). And, yes, hindsight being 20-20... I should have ordered the bonding agent. Soooooo, back to the internet, another order (and another shipping charge). And this time I ordered the milk paint mixer, too, because of the trouble I had mixing it last time (the device is basically a milk frother, so if you have an extra on hand, you could use that).


But after receiving the next package, a cold spell ensued (and the table was in the garage). So the cold, mixed with my earlier disappointment, caused the drop leaf table project to come to a halt.

Fast forward a couple months later, and I became determined to finish the project (and this time I moved the table inside). And I'm so happy (and very relieved) with the final results. Here's how it went.

I can't find my original "before" pics, so this is the closest I can get. This is between "Take 1" and "Take 2." I actually sanded the top after the first debacle, so it originally looked a little darker than this.

Steps for Painting the Drop Leaf Table with MMS Milk Paint (and an ASCP Stripe)

  1. Mix the paint (and in my case, add the bonding agent). I recommend using the electric frother-mixer.
  2. Paint! And paint some more. The paint is thin (although you could adjust this by adding less water, but I didn't have much to work with, so I was stuck with what I had)! After reading the directions, but after mixing the paint (yea, in general, I tend to have some trouble following directions), I found out that you only need to add the bonding agent on the first coat. But I had already mixed it all together (because I only had about half a bag of powder left). So the bonding agent was in the paint for each coat. My mix lasted me about three coats (although certain parts could have taken another coat, but I wasn't going to buy a whole new bag for that).

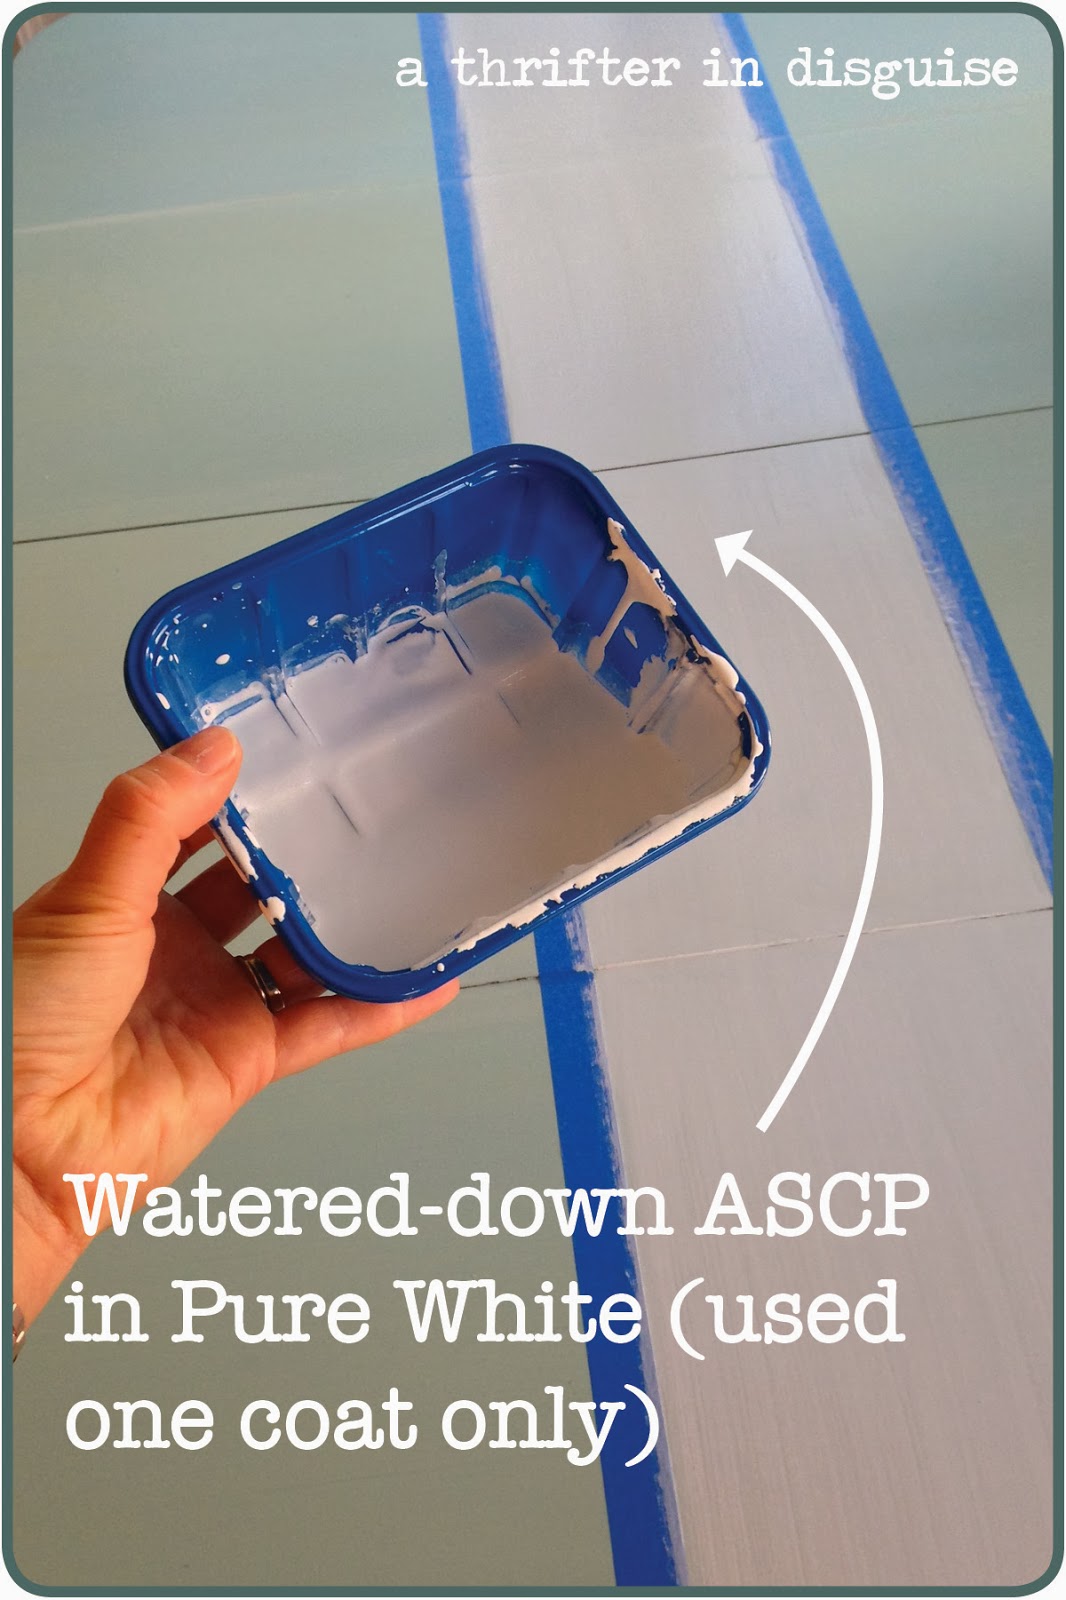
  3. Add the stripe. Although I was happy with the color of the paint, I thought the table was a little boring, so I decided to add a stripe. I had Annie Sloan Chalk Paint in Pure White on hand, so that's what I used. I wanted the stripe to be subtle, so I watered down the paint and only applied a thin coat.


  4. Distress. As Marian suggests in her videos, I used a paint scraper to distress the table. Although I had to work pretty hard at it (that bonding agent sure did its job!), I still liked this process SO MUCH better than using sandpaper or nail files (that's what I used on my Distressed Dining Table). I just can't stand how HOT the sandpaper/files get because of the friction when you're working... it gives me stomach-churning goosebumps, the way some people feel about fingernails on a chalkboard. Yuck. I don't even like thinking about it. Soooooo the paint scraper was the best idea I've heard in a while! Nice plastic handle = no friction on my fingers!


  5. Apply the Hemp Oil. This was my favorite part! I used a cut up old tee-shirt to apply the wax, and the consistency was so nice. As soon as it touched the paint,  a lovely hue emerged, making me soooo happy. Before this step I was doubting I'd use MMSMP again, but after using the hemp oil (and a little experience behind me), I think I'm going to give it all another shot! I followed the instructions and wiped the excess oil off after 30 minutes.


So there you have it... I never knew a paint would have the ability to make me cry, cringe, smile, and shout, but I guess you learn something new every day :) I'll be using the table in our upstairs hallway as our new laundry-folding station (to replace the current "station": B1's bed! Now I don't have to feel guilty if I don't finish folding all the laundry by bedtime!).


Here's one of my laundry helpers ;)
Top View: I'm so happy I added the stripe!

Have you used Milk Paint? What have you used it for? Do you like it? After all this, I need someone to commiserate (and celebrate) with ;)


Follow along on Pinterest and Instagram for more of my DIY adventures!


Featured On:

http://www.somuchbetterwithage.com/2014/01/sunday-features-43/#more-5056
The DIY Dreamer