
Take Your Family Photos to the Next Level
just in time for the holiday card season!

Amateur photographers can still get great shots, without any fancy tools!
I need to premise this post by stating that I am not a professional
photographer, nor will I be using professional terminology in this post.
I am a semi-decent amateur photographer, and I get lucky every once in a
while.
 Through my past work as a high school yearbook adviser and school
marketing
coordinator, I picked up some tricks, mostly through trial-and-error. I
get good feedback on a lot of my photos, and the steps I've taken to get
to this point are really simple. And that's what I'm going to share
with you here, because these are things ANYONE can do.
Through my past work as a high school yearbook adviser and school
marketing
coordinator, I picked up some tricks, mostly through trial-and-error. I
get good feedback on a lot of my photos, and the steps I've taken to get
to this point are really simple. And that's what I'm going to share
with you here, because these are things ANYONE can do.None of my photos are perfect, but I'm happy with "above-average" for now. I can't afford to hire a professional photographer every time I want to get great pics, and I don't have the time to take photo classes to bring my work to a higher standard.
How to Get Great Photos of Multiple Young Children (who do not sit still!)
If you have (or take care of, or love, or work with) with more than one young child (heck, just one is enough), you know that getting them all to do what you want EXACTLY when you want it is almost impossible. That's hard enough, but add in the challenge of taking a stellar photo of all of them... in most cases, it's just too overwhelming!
Now
that I'm taking a break from the workforce, I enjoy taking photos of my
kids, and every once in a while, I'll capture a lucky, one-off great
shot, but for the most part, my family photos take a lot of work! The tips I'm going to share here highlight ways that I have found success with my own family.

You Don't Need a Fancy Camera to Get a Great Shot
Even with my job experience, the many, many functions of my camera are still pretty foreign to me. Talk to me about f-stop and ISO, and I'm intrigued, but you'll lose me pretty quickly. I'll play around with those functions when I have time, but for the purpose of this post, you don't need a fancy camera, and you can use your auto function! You can even use your iPhone or iPad camera if that's your best option (I use those cameras and think they're both great, but I don't have experience with any other personal devises, so I can't speak to their quality).
 |
| This cute pic here was taken with an iPhone camera (and that was several versions ago!) |
How to Fake a Professional Photo Shoot with Multiple Young Children

Charge your camera the night before so you can go into this with a full battery, and make sure you have plenty of memory. If you skip those steps, you're setting yourself up for disaster during the photo shoot. If your camera has the option, set your photo mode to the largest size (or second-largest). This will give you more flexibility when it comes to the editing stage. Tip: Transfer any current pics you have on your camera to your computer or the cloud, and start with a clean slate. As far as memory, I use a 16 GB card in my camera, and that's sufficient for me. If you're using your iPhone or iPad, upload all your photos and delete them from your device. If you've got a lot of videos and songs on there, too, you might want to do some maneuvering before you start, but check out what your free space looks like.

Tip #2: Set the Mood (that is, your mood)
Get your game face on, because this could take a while. Try to be as fresh as you can, because any hint of impatience or frustration on your part could start a domino effect in the kids. Make sure the kids aren't too tired or they'll wear out quickly. You're going to need to wear a lot of hats here: the director, the comedian, the comforter, and the motivator... the photographer! It is not going to be easy, so don't go into this task thinking that it will! Prepare. For. The. Longhaul. See the look I'm getting in the pic below? That's the look of a kid who's had enough. That's the look you want to avoid, because it's a sign that things will go downhill fast.

Tip #3: Quantity, Quantity, Quantity
I can't say it enough, because this is the most important tool for me. I take a ton of pictures. Well, to be precise, hundreds and hundreds. In my most recent Christmas Card photo shoot, I took over 350 photos, and I only came up with ONE that I thought was usable. I broke some of my own rules with this shoot because I did it late in the day and after a full day of school, but the inspiration struck me, so I had to go with it. And luckily, I got one that I could use. Really, I can't say enough about this step. You need to have a ton of pics to choose from, and the people you're taking pics of are going to get annoyed at you. Just face it. But ignore them, because you know best. Smile, refer to Step 1, and keep on shooting. The photo below is one of the hundreds I took the day of the Christmas card photo featured at the top of the post. The pic of the smiling cuties up there isn't reflective of the whole shoot. I spent most of the time trying to focus them and keep them happy. See below: one unfocused, one unhappy. But it was okay, because I took their lead. Clearly they'd had enough of this scenario, so to get them reinvigorated, I had them hold hands and walk/run down the beach for a while (which they had a lot of fun with), and you can see from the card featured at the top of the post, one of those ended up being the magic shot!

Tip #4: Go Outside
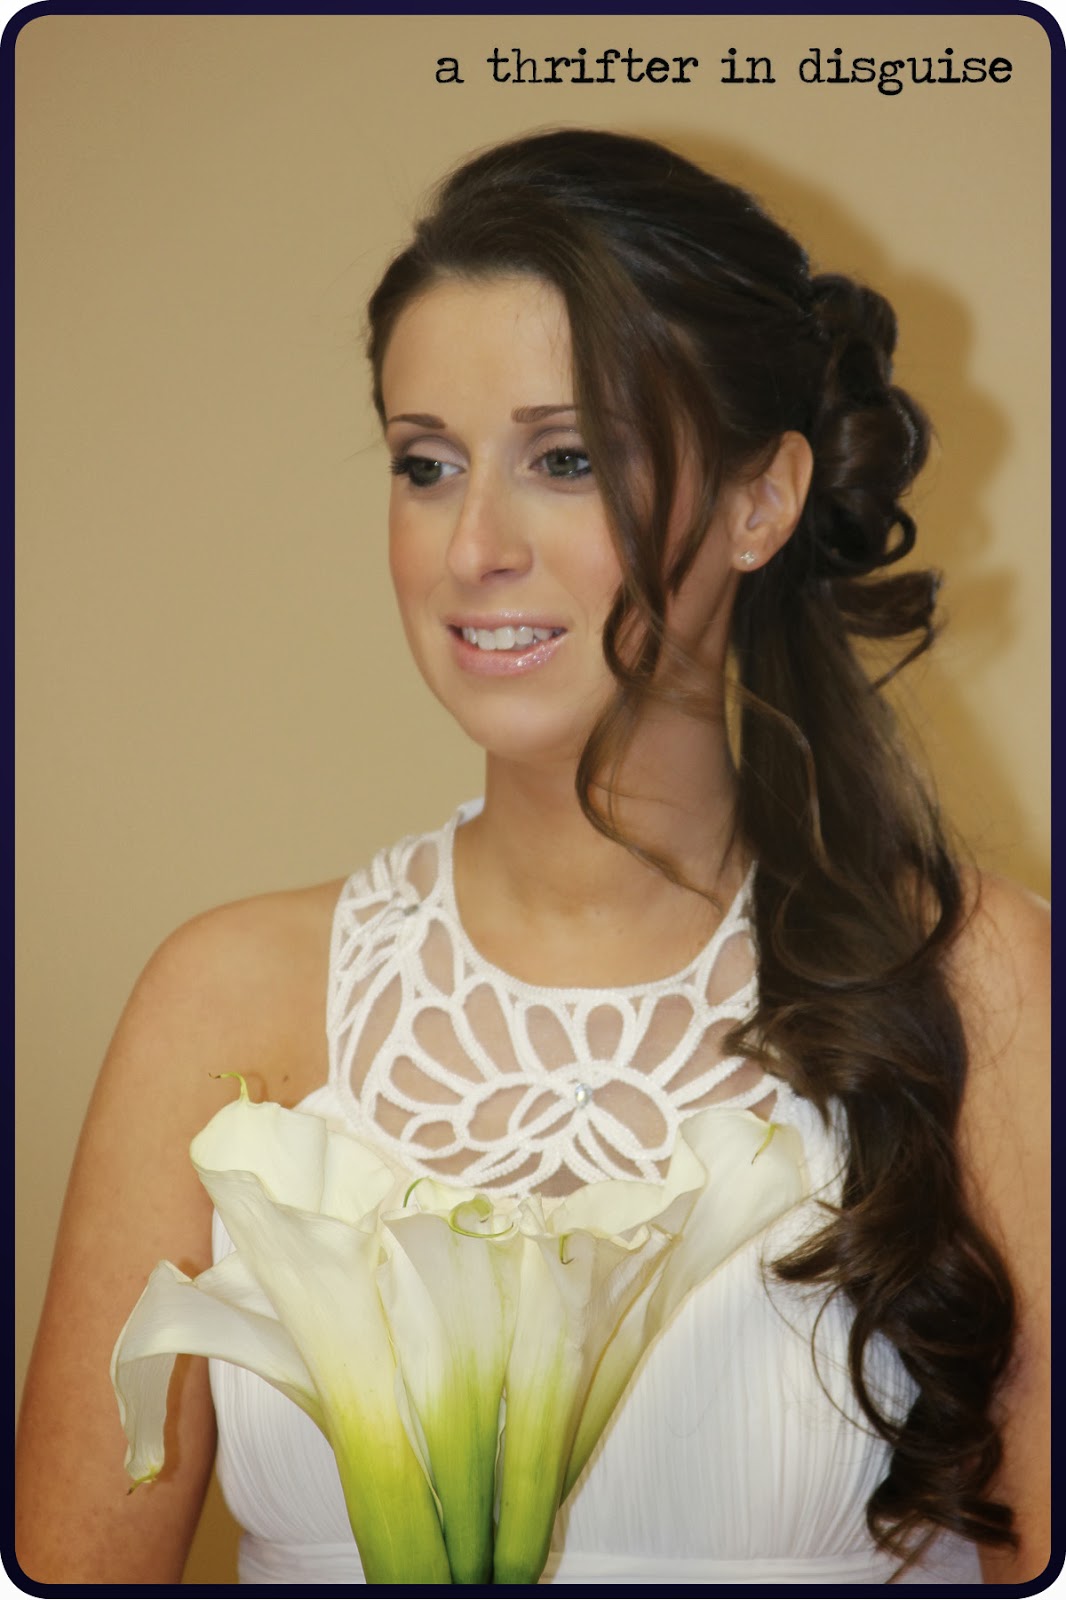
Natural light beats inside light hands-down. Your pics outside will look more crisp and natural, so go for it! Last winter I photographed my brother's wedding, and went so far as to force the bride (my new sister-in-law) to stand outside in the freezing cold in February so I could get the shots I wanted. I could see in her eyes that she started having serious doubts about marrying into the family, but it was too late at that point :) But look at the difference here. I mean, she's beautiful either way, but see how much that outside photo shines?! Same camera, same day. That's the difference natural light makes.

Tip #5: Don't Shoot in Full Sun
Why? Sun = Shadows. So while your photo quality is generally better outside, full sun causes a lot of shadows, and that can cause shadows in people's faces, too. It also causes people to squint! If you can, wait until the sun is lower, or better yet, shoot on an overcast day. I get my best shots on overcast days. See the pic below? The composition is nice, but the shadows on their faces and bodies depreciate the quality of the photo.

Tip #6: Steer Clear of Sun Spots
This is a really common mistake, and it's so easy to fix. Look at the pic below. Still very cute, but it could be a lot better, and the biggest problem is the shadows being cast on the kids. Sometimes it's unavoidable. This was an impromptu shot and will always be special because it reminds me of that fun day, but it doesn't have that professional-quality look because of the shadows. But because you're personally orchestrating your new shots, don't make that mistake! If you want your subjects to stand in the shade (so that you can avoid the full sun), make sure it is uninterrupted shade. Look at the ground; are there spots of sun shining through? Then pick another spot, because those spots will show up right on your subject's faces or bodies.
Tip #7: Choose a Neutral Background
Ok, so don't take this too literally. You don't need to put up a white sheet or anything, just don't pick a background that's too busy. If there's too much going on in the background, you'll lose your focus: the kids! So pick somewhere that's nice, but for this purpose, don't let the surroundings be your focus (unless, of course that's the point of your pic. If you're at the Eiffel Tower or something, that's different!) See below, the baby riding the dog is cute, but there are too many toys surrounding her to be able to really focus on what's going on.

Tip #8: Get Close, and Move Your Feet
Even though we all have programs that help us crop our pics, the closer you are during the actual pic, the less of this you will have to do, and the better quality your photo will be (meaning you can print it larger, etc.). So get right in there. Like, a few feet from them if you can. Some people get freaked out by this at first, but kids don't usually mind. Get close. You also want to walk around and shoot from different angles, including up high and down low. This can give the pics a really cool effect. Have fun with it! I'm sure my neighbors have plenty of adjectives to describe me as I lay with my camera, flat on my stomach in a pile of leaves, taking pics of my children while dangling skittles behind my back... but that's okay with me. I've made my peace with it :) See the pic below? I don't think anyone ever told my dad about the "Get Close" rule. Many of our family photos look like this. Sure, my brother and I look cute, but what do you make of that awesome shag carpet?!

Tip #9: Resort to Bribery
I apologize in advance to those better souls who would never bribe a child... you are certainly better people than me. But with that out of the way, I will wholeheartedly admit that I bribe my children so that they will be happier and better-behaved in our photo shoots. I arrange for a "snack" mid-shoot and offer other treats for when we're finished. This whole process is really tiring for them, and they're going to need to be good sports for you to get the result you want. I find that I have a lot more success when I let go of some of the "rules" for a while when we're taking pics like this. We all enjoy it a lot more.

Tip #10: Be Patient, Stay in the Moment, and Be Willing to Let Go of Perfection
Don't be too hard on yourself. I am not exaggerating when I say that for about every 200 pictures I take, there is 1 that I'm sincerely happy with. But remember, you're also your toughest critic. If you follow these rules, you're apt to end up with a handful to choose from. And stay in the moment. Don't waste time during the photo shoot looking through the pics you've taken and erasing the bad ones. You can do that later. Just shoot! And be prepared for a lot of these looks (all taken during my most recent Holiday Card shoot)... and when you do, take a deep breath, smile and remember the words of Crosby, Stills, Nash, "...just look at them and sigh, and know they love you!"


Postproduction
This part can be fun. Spend some time cropping your photo to get just the look you want. Maybe you want to get rid of an orange cone in the background or the neighbor's lawnmower. You can also experiment with black and white and sepia tone. Depending on the look you want, they can add a special touch to your pic. But don't go too crazy with effects or it starts to look cheesy.


Now go out and shoot! And if you found any of this info helpful, let me know... and I'd love to see your pics!
As far as printing the cards, I typically use Vistaprint (just like for my business cards) because I like their value and quality, and they're almost always running a sale. I make my own layout in Adobe CS and upload it to Vistaprint, which is another reason I like using them (because they have that option). But there are so many other online sites, and drugstores like CVS and Rite Aid offer holiday card options, too, often at a really good turn-around time.
Have fun!!!!!


No comments:
Post a Comment
Note: Only a member of this blog may post a comment.